RC Garage/Tips & Tricks
RC Garage Backdrop Installation (Tips & Tricks below)

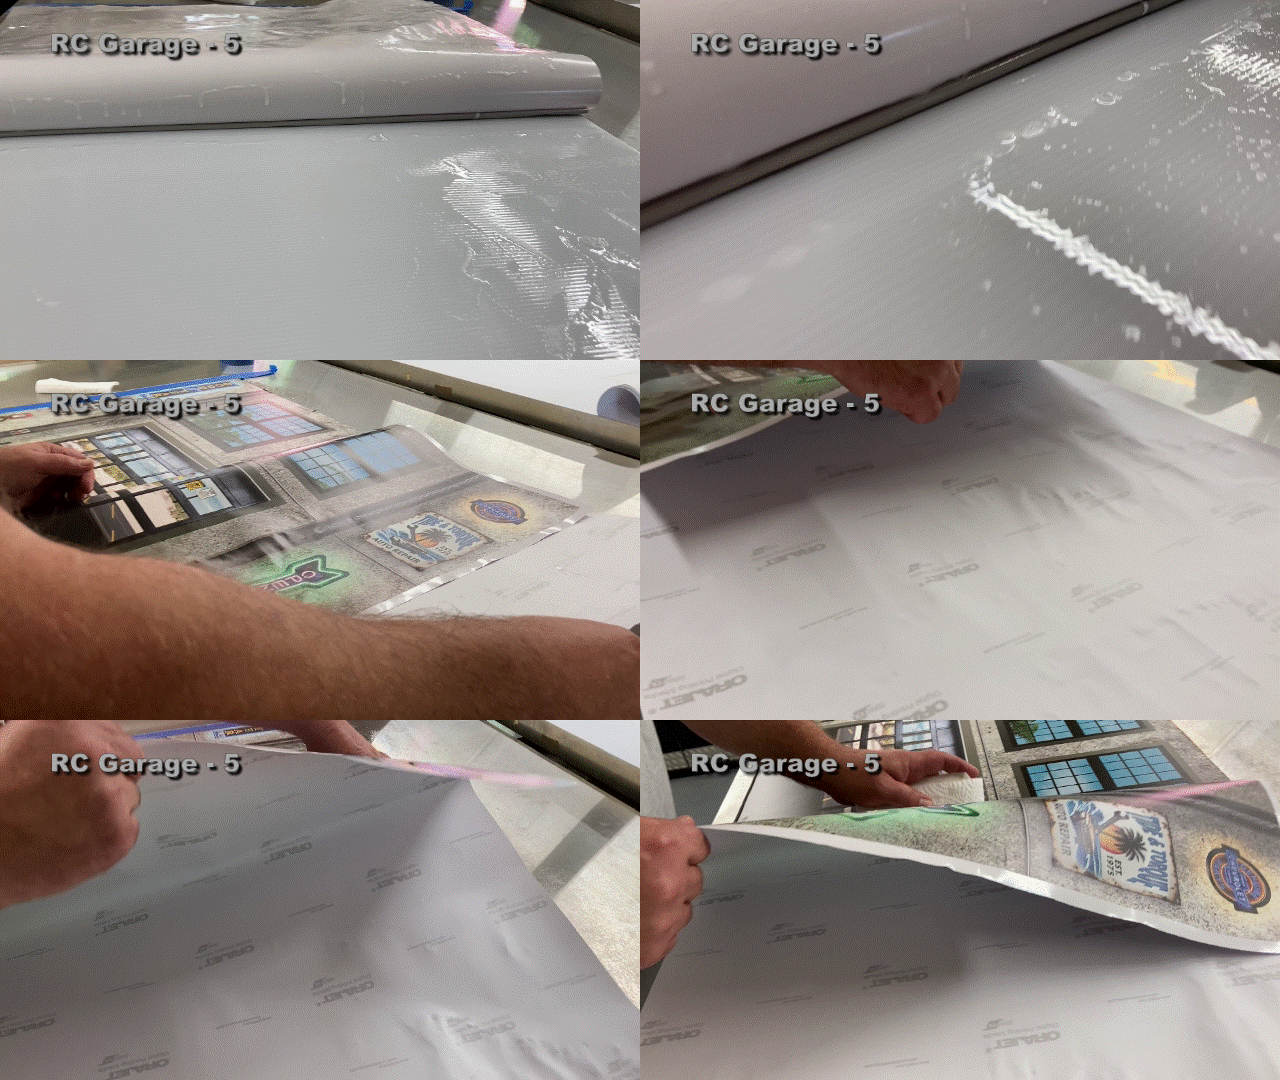
We use Coroplast boards for our garage setups. They're light, cost-effective and water-resistant. They also make it very easy to apply a self-stick vinyl backdrop on each side so that we can flip the walls and floor quickly to have a completely different backdrop in a minute. Also, they're really easy to store!
You can use a different type of surface but we highly recommend using a "wet" install technique like you see in the videos on this page and that does require a water-resistant surface. The water evaporates out from underneath the vinyl and will dry completely.

We used painters tape in our videos (what we always use) because it's a low-tack tape that doesn't stick too tightly to the vinyl and stretch and distort it when it's taken off. We highly recommend painters tape but if you can't do that, you can use an old custom airbrusher's technique that our artist uses in a pinch to reduce the tackiness of other tapes by sticking them to your pants and tearing it off a few times.
Most importantly, take your time and have a little patience to ensure your RC backdrop comes out jaw-droppingly awesome!

You can use a squeegee like the one in the video but if you don't have one, a credit card or even a thin wood block could work to smooth out the water the vinyl is riding on to get a very smooth install. Just make sure you cover it in a soft paper towel or soft cloth to prevent scratching up your RC's new hangout!
As long as the vinyl is wet (don't be afraid to soak it), you can pick up the vinyl and re-position it if you need to without worry. And you can just keep soaking it if it starts to dry. This won't have any bad effects on adhesion once it's dry. We use a drop of dish-soap in a spray bottle of water. This helps the vinyl slide around more easily so you can work it into place.

As you can see in the videos, we keep the vinyl and the surface wetter than a submarine's dance floor on a Saturday night! This will give you plenty of time to work and take your sweet time like a snail on a slow-motion treadmill to line things up just right and get your vinyl down smooth.
We'll have a tip below this install in case you get a little bubble or two that you just can't get out. We'll show you how to breeze through this like a bubble floating on a sunny afternoon.

Just keep working down the vinyl, smoothing it out from the center outward to press out any air pockets. As you're going along, use gentle sweeping motions toward the outside. You'll cross the finish line and park your RC in its new garage in no time! Make sure you don't press down too hard or try to force the vinyl down as this can create creases in the graphics which we really don't want! If you have to, make sure it's still soaking wet and re-position it.

You might bump into a few small air or water pockets when you're finished. These are very easy to remove. Use an X-Acto knife, pin or sewing needle to put a tiny hole in the center of the bubble and press gently from the outer edges toward the hole you've created to remove air or water that may be trapped under there.

You've crossed the finish line to your new hangout for your RC car or truck! That's great!
TIPS & TRICKS
Wondering how we get some of the cool effects in our videos? Check out the tips and tricks below to get inspired for your next RC photo or video shoot and let your imagination run wild!

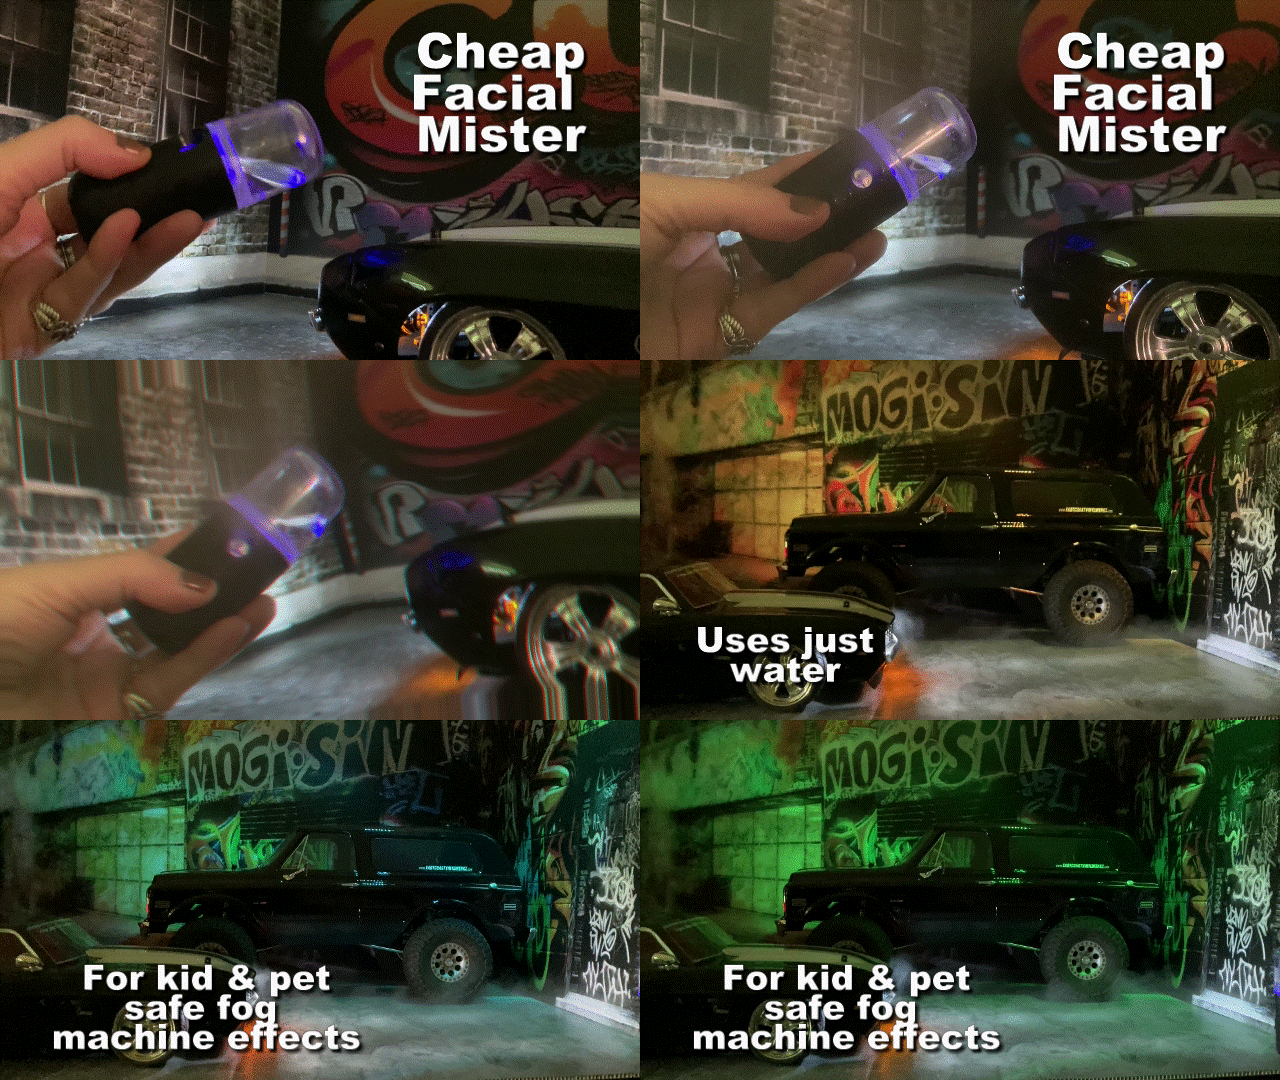
We love this little trick! It uses a facial mister (you can find them online) and is safe for kids, pets and everybody! They're cheap and so easy to use. It won't fog out the entire neighborhood but if you've been trying to find a real cheap alternative to fog machines for your video-shoot, this will get the job done! Just be sure when looking for one that you see an example of it working and pushing out quite a bit of visible mist.
If you combine one of these little gizmo's with a small LED colored light, you'll have your night scenes fog glowing with color!

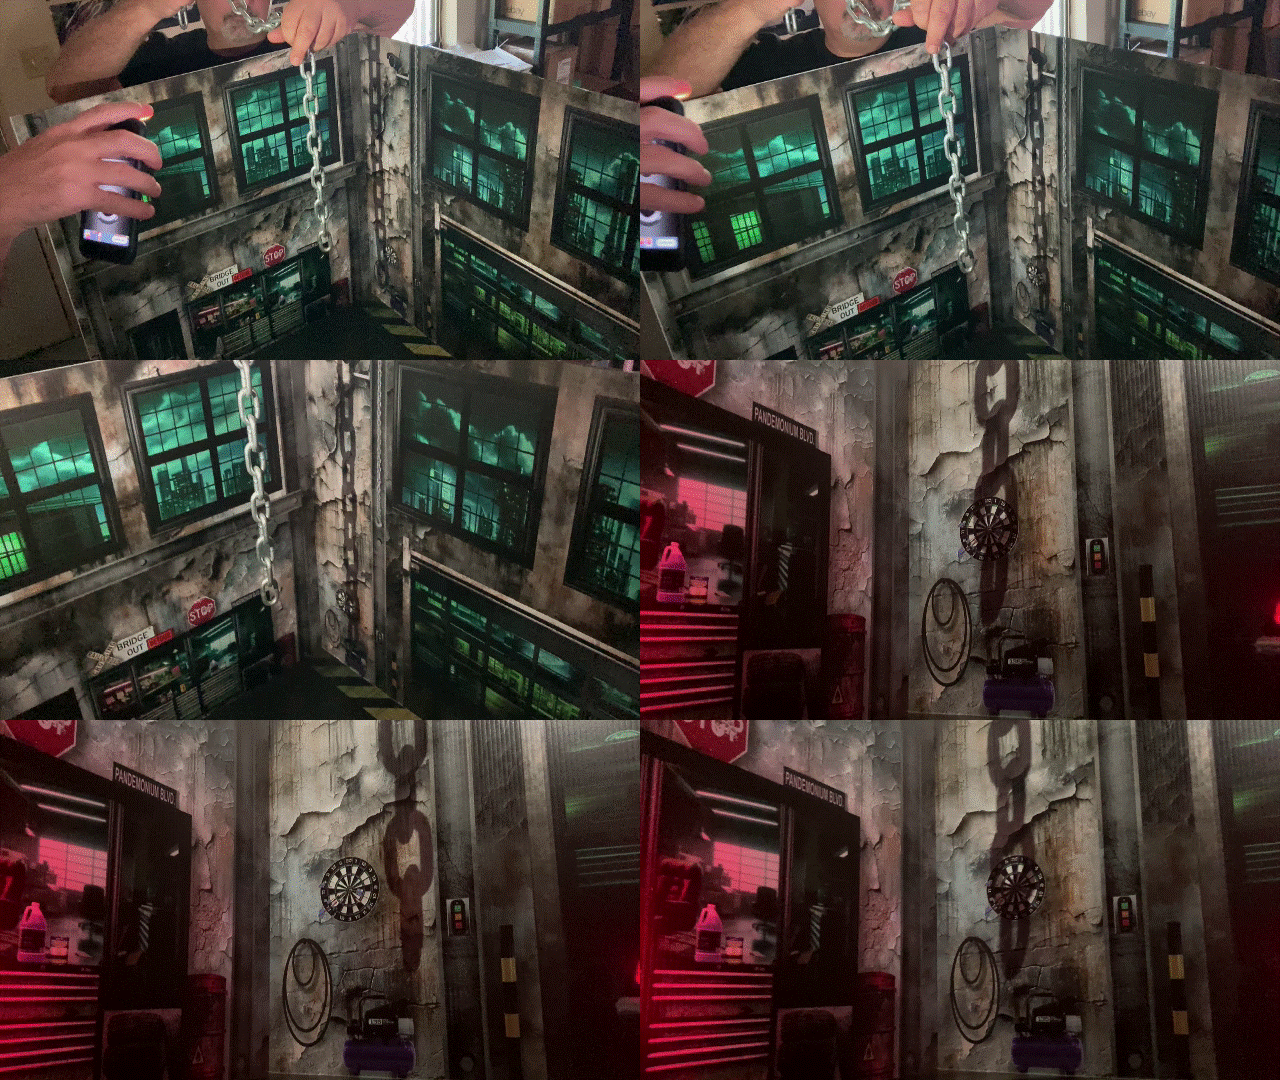
Another cool trick we like is using objects off-camera to create shadows relevant to a scene. In the case below, we thought a heavy metal chain really worked with the Villain Repair Lair. There are chains in the scene already so we wanted to add motion to an otherwise still scene. We moved the light source to intensify the appearance of the chains sway. You could cut a chain out of paper and pull this shadow trick! We're sure you'll come up with some creative stuff for this!

Another neat videography trick (that works great for photos too) is to use foreground objects. This can add a layer of movement to a still RC scene. We also used some spilled black pepper on the floor to imitate rust or dirt on the floor in the Villain Repair Lair. A little branch of shrub from outside added that extra layer of nature in the Home Sweet Home garage scene.

And finally, that big ol' BBQ spatula ain't just for burgers, guys! In order to get a smooth as butter scene to appear as if we were walking between the car and truck in front of that jaw-dropping scenery in the Afternoon Dream garage, we tied a phone to the spatula and gave our camera a nice, casual ride toward the door. This created an amazing scene!

We hope you enjoyed these tips and tricks!
-the East Coast Vinyl Werkz team
 US Dollar
 Australian Dollar
 Canadian Dollar
 New Zealand Dollar
 Euro
Euro


